


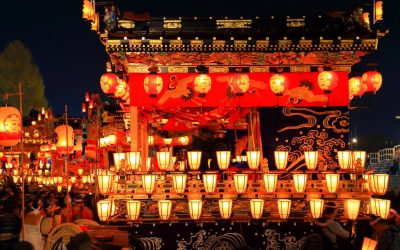


Chichibu Yomatsuri, Festival Tradisional Jepang yang Memukau
Chichibu Yomatsuri bukan sekadar festival tradisional biasa. Perayaan yang berlangsung setiap awal Desember di Kota Chichibu, Jepang, ini menghadirkan perpaduan…

Usaha Burger: Peluang Kuliner yang Mudah Berkembang
Bisnis kuliner selalu memiliki tempat di hati masyarakat. Di tengah banyaknya pilihan makanan yang bermunculan setiap tahun, usaha burger tetap…

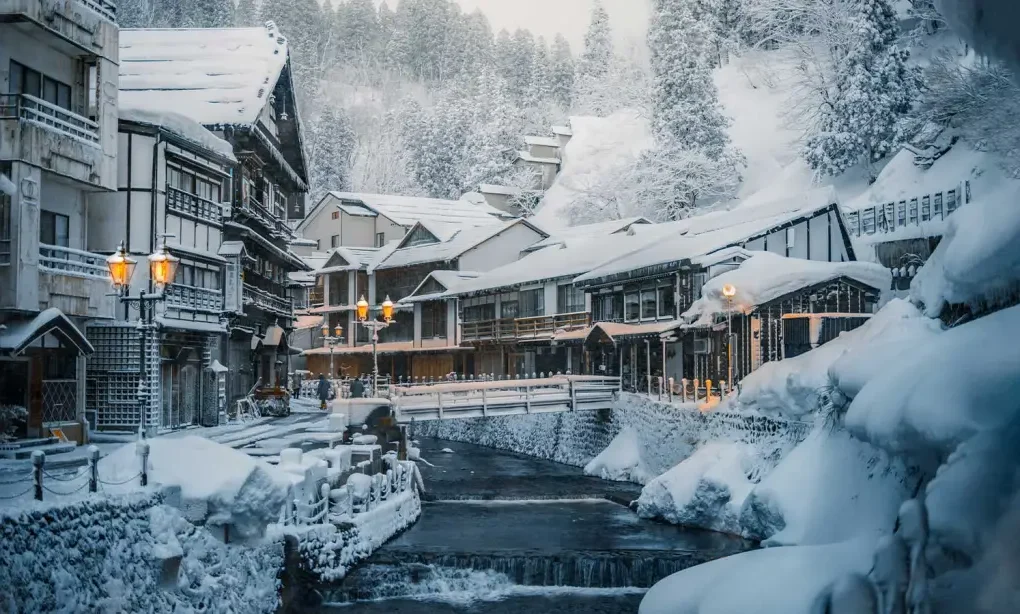
Taman Odori, Destinasi Musim Dingin yang Wajib Masuk Bucket List
Taman Odori menjadi salah satu destinasi wisata musim dingin yang paling menarik untuk dikunjungi di Jepang. Terletak di pusat kota…

Rachel Goddard, Selebgram Indonesia yang Memukau Mata dan Menghibur Jutaan Pengikut
Di tengah derasnya arus konten digital yang silih berganti setiap hari, hanya sedikit kreator yang mampu mempertahankan relevansi dalam jangka…

Festival Yee Peng, Tradisi Unik Thailand yang Menerangi Langit Malam
Festival Yee Peng merupakan salah satu tradisi paling ikonik di Thailand yang setiap tahun berhasil menarik perhatian wisatawan dari berbagai…

Penyumbatan Otak: Ancaman Tersembunyi yang Mengganggu Aliran Kehidupan dalam Tubuh
Penyumbatan Otak sering muncul tanpa tanda yang jelas pada awalnya, namun kondisi ini perlahan mengganggu fungsi tubuh yang paling vital….

BYD Atto 1 dan Rating Keselamatan Mobil Hybrid
Mobil elektrifikasi kini bukan lagi sekadar tren kota besar. Dalam beberapa tahun terakhir, pasar otomotif Indonesia mulai dipenuhi kendaraan hybrid…

sakit asma: Penyebab, Gejala, dan Cara Mengatasinya
sakit asma menjadi salah satu penyakit pernapasan yang paling sering dialami masyarakat dari berbagai usia. Mulai dari anak-anak hingga orang…

Reza Arap Tetap Membumi di Tengah Deretan Penghargaan? Ini Faktanya!!
Nama Reza Arap sudah lama melekat dalam dunia hiburan digital Indonesia. Sosok yang dikenal lewat konten gaming, musik, hingga podcast…

Chery Omoda 5, SUV Stylish yang Makin Disukai
Mobil SUV kini bukan lagi sekadar kendaraan keluarga dengan bodi besar. Dalam beberapa tahun terakhir, tren SUV bergeser menjadi simbol…